Webview in Chat
We have learned how to ship features in chat, but sometimes chat UI is not suitable for every feature. In this lesson, you'll learn how to open a webview to provide more features in GUI.
Time to accomplish: 15 minutes
info
Extend a Webview
Finally let's implement the deleting todo feature. But this time, we are going to use a webview to display all the finished and unfinished todos.
Open Webview
Follow the guide of the platform to add a button for opening the webview:
- Messenger
- Telegram
- LINE
Edit the WithMenu component like this:
import { WebviewButton as MessengerWebviewButton } from '@sociably/messenger/webview';
  //...
  if (platform === 'messenger') {
    return (
      <>
        {children}
        <Messenger.ButtonTemplate
            buttons={
              <>
                <Messenger.PostbackButton
                  title={listLabel}
                  payload={listData}
                />
                <Messenger.PostbackButton
                  title={addLabel}
                  payload={addData}
                />
                <MessengerWebviewButton title="Edit 📤" />
              </>
            }
        >
            {info}
        </Messenger.ButtonTemplate>
      </>
    );
  }
  //...
Edit the WithMenu component like this:
import { WebviewButton as TelegramWebviewButton } from '@sociably/telegram/webview';
  //...
  if (platform === 'telegram') {
    return (
      <>
        {children}
        <Telegram.Text
          replyMarkup={
            <Telegram.InlineKeyboard>
              <Telegram.CallbackButton
                text={listLabel}
                data={listData}
              />
              <Telegram.CallbackButton
                text={addLabel}
                data={addData}
              />
              <TelegramWebviewButton text="Edit 📤" />
            </Telegram.InlineKeyboard>
          }
        >
          {info}
        </Telegram.Text>
      </>
    );
  }
  //...
Edit the WithMenu component like this:
import { WebviewAction as LineWebviewAction } from '@sociably/line/webview';
  //...
  if (platform === 'line') {
    return (
      <>
        {children}
        <Line.ButtonTemplate
          altText={`You have ${todoCount} todos now.`}
          actions={
            <>
              <Line.PostbackAction
                label={listLabel}
                displayText={listLabel}
                data={listData}
              />
              <Line.PostbackAction
                label={addLabel}
                displayText={addLabel}
                data={addData}
              />
              <LineWebviewAction label="Edit 📤" />
            </>
          }
        >
          {info}
        </Line.ButtonTemplate>
      </>
    );
  }
  //...
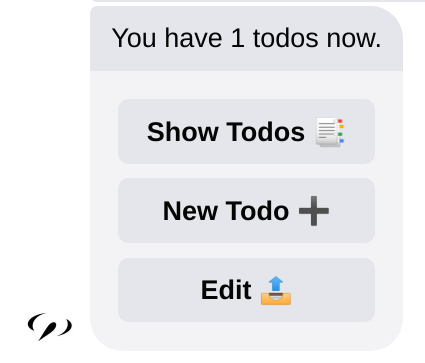
Now an Edit 📤 button is added in the menu like this:

Try tapping the button and you should see the default webview is already working!
Webview Client
The web front-end codes are in the webview directory.
Check webview/pages/index.tsx file and you'll see a WebviewClient is created with the useClient hook.
Like:
- Messenger
- Telegram
- LINE
  // ...
  const client = useClient({
    mockupMode: typeof window === 'undefined',
    authPlatforms: [
      new MessengerAuth({ pageId: MESSENGER_PAGE_ID }),
    ],
  });
  // ...
  // ...
  const client = useClient({
    mockupMode: typeof window === 'undefined',
    authPlatforms: [
      new TelegramAuth({ botName: TELEGRAM_BOT_NAME }),
    ],
  });
  // ...
  // ...
  const client = useClient({
    mockupMode: typeof window === 'undefined',
    authPlatforms: [
      new LineAuth({ liffId: LINE_LIFF_ID }),
    ],
  });
  // ...
The client will log in the user and opens a connection to the server.
We can then use it to communicate with the server.
Webview Page
Let's display all the todos in the webview. Edit the index page to this:
import { TodoState } from '../../src/types';
// ...

const WebAppHome = () => {
  // ...
  const data = useEventReducer<null | TodoState>(
    client,
    (currentData, { event }) => {
      if (event.type === 'app_data') {
        return event.payload.data;
      }
      return currentData;
    },
    null
  );

  return (
    <div>
      <Head>
        <title>Edit Todos</title>
        <link
          rel="stylesheet"
          href="https://cdn.jsdelivr.net/npm/water.css@2/out/water.css"
        />
      </Head>

      <main>
        <h4>You have {data ? data.todos.length : '?'} Todo:</h4>
        <table>
          <tbody>
            {data?.todos.map((todo) => <tr><td>{todo.name}</td></tr>)}
          </tbody>
        </table>

        <h4>You have {data ? data.finishedTodos.length : '?'} finished Todo:</h4>
        <table>
          <tbody>
            {data?.finishedTodos.map((todo) => <tr><td>{todo.name}</td></tr>)}
          </tbody>
        </table>
      </main>
    </div>
  );
};
// ...
info
The JSX in the webview is React.js element. While the Sociably JSX is rendered into chat messages, the React JSX is rendered into HTML content.
The useEventReducer hook
is the simplest way to handle events from the server. Every time a event is received,
the reducer function is called to update the data.
const data = useEventReducer(client, reducerFn, initialValue);
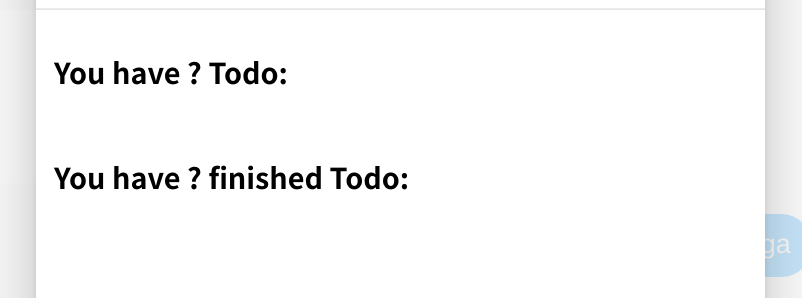
Because there is no data now, the webview should look like this:

Communicate to Webview
On the server side, we have to send the todos data to the webview.
Edit the handleWebview handlers to this:
import { makeContainer } from '@sociably/core/service';
import TodoController from '../services/TodoController';
import { WebAppEventContext } from '../types';

const handleWebview = makeContainer({
  deps: [TodoController],
})(
  (todoController) =>
    async (ctx: WebAppEventContext & { platform: 'webview' }) => {
      const { event, bot, metadata: { auth } } = ctx;

      if (event.type === 'connect') {
        const { data } = await todoController.getTodos(auth.channel);

        return bot.send(event.channel, {
          type: 'app_data',
          payload: { data },
        });
      }
    }
);

export default handleWebview;
The bot.send(channel, eventObj) method sends an event to the webview.
Here we emit an 'app_data' event every time a webview 'connect'.
The metadata.auth object contains the authorization infos.
The auth.channel refers to the original chatroom,
so we can use TodoController to get todos data.
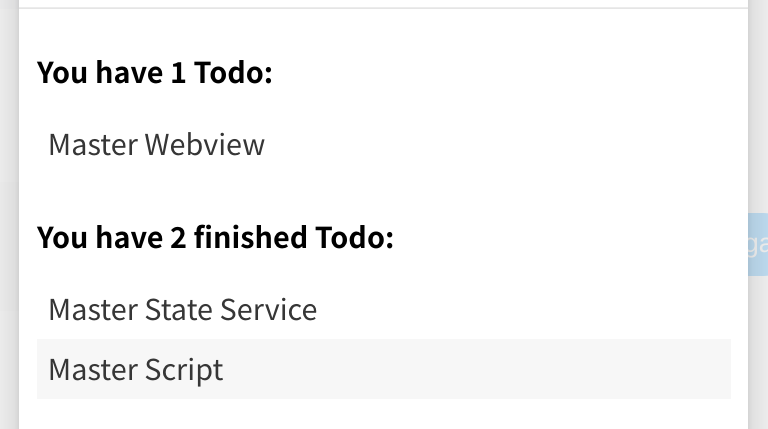
Now the webview should display the todos like this:

Send Event to Server
Let's add a button to delete a todo. Edit the index page like this:
// ...
const WebAppHome = () => {
  // ...
  const TodoRow = ({ todo }) => (
      <tr>
        <td style={{ verticalAlign: 'middle' }}>{todo.name}</td>
        <td style={{ textAlign: 'right' }}>
          <button
            onClick={() => {
              client.send({
                type: 'delete_todo',
                payload: { id: todo.id },
              })
            }}
          >
            ❌
          </button>
        </td>
      </tr>
  );

  return (
    <div>
      <Head>
        <title>Edit Todos</title>
        <link
          rel="stylesheet"
          href="https://cdn.jsdelivr.net/npm/water.css@2/out/water.css"
        />
      </Head>

      <main>
        <h3>Press ❌ to delete todos</h3>

        <h4>You have {data ? data.todos.length : '?'} Todo:</h4>
        <table>
          <tbody>
            {data?.todos.map((todo) => <TodoRow todo={todo} />)}
          </tbody>
        </table>

        <h4>You have {data ? data.finishedTodos.length : '?'} finished Todo:</h4>
        <table>
          <tbody>
            {data?.finishedTodos.map((todo) => <TodoRow todo={todo} />)}
          </tbody>
        </table>
      </main>
    </div>
  );
};
//...
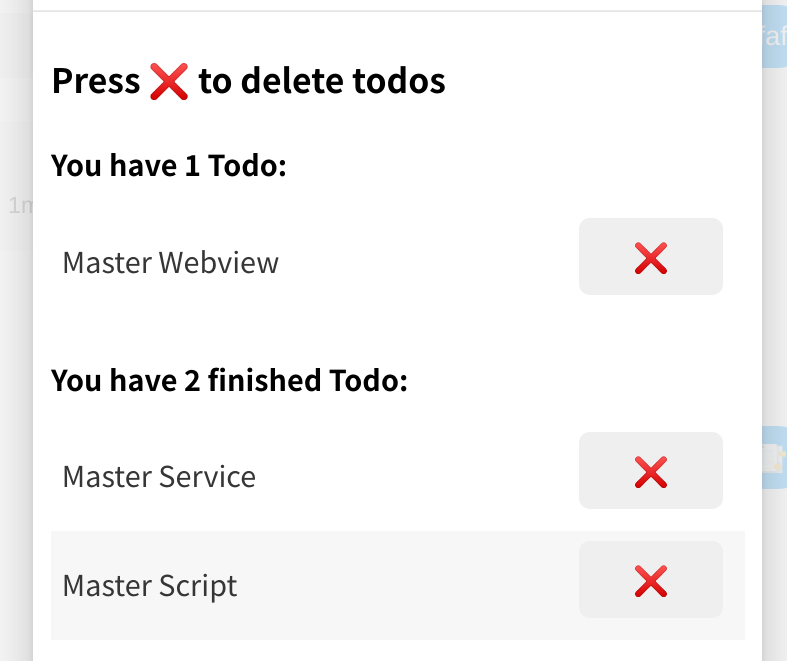
We add a ❌ button on every TodoRow to delete the todo.
Now the webview should look like this :

The client.send(eventObj) method sends an event back to the server.
Here we emit a 'delete_todo' event when the ❌ button is tapped.
We can then handle it at server side like this:
  // ...
  if (event.type === 'delete_todo') {
    const { todo, data } = await todoController.deleteTodo(
      auth.channel,
      event.payload.id
    );

    return bot.send(event.channel, {
      type: 'app_data',
      payload: { data },
    });
  }
  //...
We delete the todo in the state when a 'delete_todo' event is received.
Then emit an 'app_data' event to refresh the data.
Now the todos can be deleted in the webview like this:
Congratulations! 🎉 You have finished the Sociably app tutorial. Now you are able to combine JSX Chat UI, Services, Dialog Scripts and Webview to build a feature-rich app with amazing experiences in chat.
Here are some resources you can go next:
- Learn more about Sociably at our Documents.
- Check the complete Todo Example. You can find some omitted features there, like paging and editing todo.
- Check more examples:
- Note Example - take notes in the webview.
- Pomodoro Eample - pomodoro timer in chat.
- 4digits Example - play guessing 4 digits game in chat.
- Visit GitHub discussions to ask a question.
- Follow our Twitter to know any updates.